CCD Stack -
The luminance images were loaded into CCDStack and calibrated with darks, flats and bias applied. Then an std sigma reject was applied to all images and the rejected pixels were imputed. Then a positive constraint deconvolution was applied with 100 iterations. The images were then registered, normalized and stacked using a sum combine. A DDP adjustment was then applied on the summed image with auto scale and adjustments were made to background, maximum and gamma settings. The image was then saved as a 16 bit .tif file. All of the same functions were applied to the red and blue frames with the exception of deconvolution and the fact that a maximum combine instead of a sum was used for stacking.
Photoshop CS2 -
On the luminance image, I used space noise reduction from Noel Carboni's Astronomy Tools and star trail elimination from Peter's Actions for Astrophotographers.
I applied a median filter to process out some black artifacts that resulted from a poor dark subtraction.
I switched to lab color and deselected all but the lightness channel and saved the image (this brings about an overall brightening of the image).
I applied a coarse high pass sharpening to the galaxy core and rim.
There was some grainyness to the image background so I did a gaussian blur subtraction using Apply Image with blending set to subtract and an offset of 25.
LRsGB processing was done by following a combination of Steve Cannistra's 'Modified Bicolor Technique' and R. Scott Ireland's LRGB procedures from his book 'Photoshop Astronomy'. A synthetic green channel was created prior to color processing. A couple of action steps applied to the color image were soft color gradient removal and increase star color.
There were many other steps applied in Photoshop in the .tif and .jpg formats too numerous to mention (or remember for that matter).
Registax 3 -
Wavelet filters were applied here. That's all.
PixInsight 1.0-
A dynamic background extraction was applied and prior to image sharpening an SGBNR smoothing routine was applied.
________
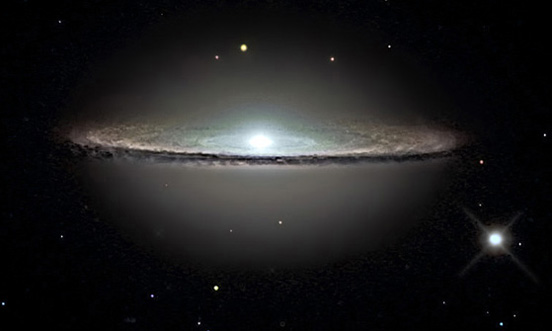
Here is the absolutely final widefield full resolution image (honest) of M104. There were two minor corrections done in Photoshop. First, three large stars in the image were damaged because they weren't protected during processing, so I replaced them with the stars as they were before processing. Second, the top star halo of M104 was too blotchy and unnatural so I lassoed the area and went to the filter menu and selected Pixelate and applied the fragment function to the area which took care of most of the blotchies.
Be sure to click on the image for the full widefield view:

©2008 Richard Murray
Full Size Image