Several years ago I renewed my interest in astronomy by purchasing a Meade LX90 telescope. I enjoy imaging deep sky objects and maintaining an ongoing journal about them and my processing methods. I hope my enthusiam for my hobby comes through to viewers of this blogsite.
Rick Murray
Saturday, November 14, 2009
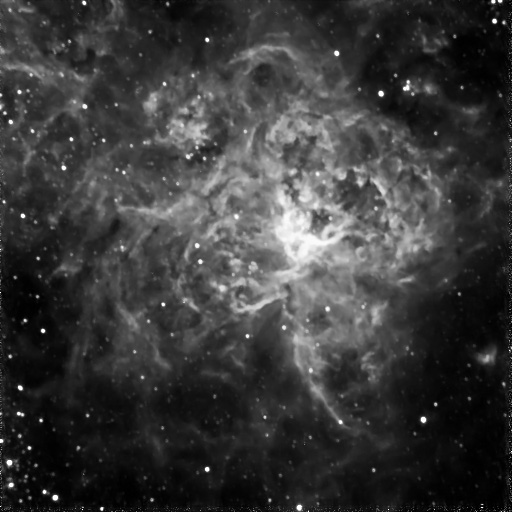
NGC2070 Tarantula Nebula Southern Hemisphere
©2009 Richard Murray
Notes: The Tarantula is a giant emission nebula within our neighboring galaxy the Large Magellanic Cloud. It is so bright that if it were the same distance as the Orion Nebula it would cast shadows!
The image above is a stack of five 10 minute H-Alpha filtered exposures.
I also took red, green and blue exposures which I will process later.
Date(s): 11/12/09
Object(s): NGC 2070 Tarantula Nebula
Telescope: RCOS 16" - FL 3360mm @ f/8.4
Mount: Paramount ME
Camera: SBIG STL-1001E - NABG
Guiding: On Camera
Filters: Ha
Exposure(s): 5 x 600 sec Ha, Binning 2x2
Processing: CCDStack and Photoshop
Location: Moorook, South Australia
Thursday, October 29, 2009
M104 Sombero Galxaxy How It Was Done
I can't give you all of the particulars of how I processed this image because my methods vary with each one but I certainly can give you an overview so here it goes:
CCD Stack -
The luminance images were loaded into CCDStack and calibrated with darks, flats and bias applied. Then an std sigma reject was applied to all images and the rejected pixels were imputed. Then a positive constraint deconvolution was applied with 100 iterations. The images were then registered, normalized and stacked using a sum combine. A DDP adjustment was then applied on the summed image with auto scale and adjustments were made to background, maximum and gamma settings. The image was then saved as a 16 bit .tif file. All of the same functions were applied to the red and blue frames with the exception of deconvolution and the fact that a maximum combine instead of a sum was used for stacking.
Photoshop CS2 -
On the luminance image, I used space noise reduction from Noel Carboni's Astronomy Tools and star trail elimination from Peter's Actions for Astrophotographers.
I applied a median filter to process out some black artifacts that resulted from a poor dark subtraction.
I switched to lab color and deselected all but the lightness channel and saved the image (this brings about an overall brightening of the image).
I applied a coarse high pass sharpening to the galaxy core and rim.
There was some grainyness to the image background so I did a gaussian blur subtraction using Apply Image with blending set to subtract and an offset of 25.
LRsGB processing was done by following a combination of Steve Cannistra's 'Modified Bicolor Technique' and R. Scott Ireland's LRGB procedures from his book 'Photoshop Astronomy'. A synthetic green channel was created prior to color processing. A couple of action steps applied to the color image were soft color gradient removal and increase star color.
There were many other steps applied in Photoshop in the .tif and .jpg formats too numerous to mention (or remember for that matter).
Registax 3 -
Wavelet filters were applied here. That's all.
PixInsight 1.0-
A dynamic background extraction was applied and prior to image sharpening an SGBNR smoothing routine was applied.
________
Here is the absolutely final widefield full resolution image (honest) of M104. There were two minor corrections done in Photoshop. First, three large stars in the image were damaged because they weren't protected during processing, so I replaced them with the stars as they were before processing. Second, the top star halo of M104 was too blotchy and unnatural so I lassoed the area and went to the filter menu and selected Pixelate and applied the fragment function to the area which took care of most of the blotchies.
Be sure to click on the image for the full widefield view:
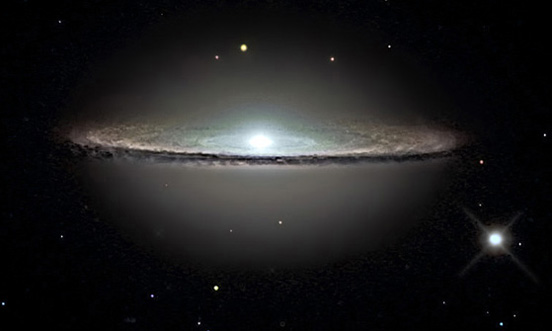
©2008 Richard Murray
Full Size Image
Monday, August 31, 2009
Next Imaging Target CED214 Emission Nebula
©2008 Richard Murray
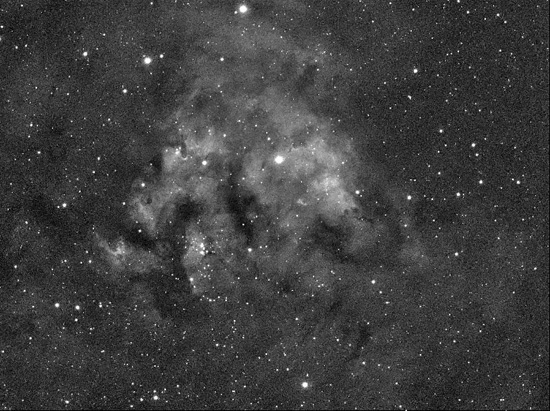
Notes: This large emmision nebula in the constellation Cepheus (also known as the Calf Nebula) will be my next narrowband imaging target. I'll start the project as soon as the moon goes away around mid September. This one will be a minimum of 18 hours imaging with 6 hours for each narrowband filter (Ha, OIII, SII).
I think this one holds a lot of promise with a large amount of nebulosity and structure.
The image above is a single shot 240 second Ha exposure.
Date(s): 8-30-09
Object(s): Emission Nebula in Cepheus
Telescope: Megrez 66mm SD Doublet APO, WO 0.8 FR/FF
Mount: LX90
Camera: Atik 16hr
Guiding: Lx90 8" SCT, DSI Pro, Phd Guiding
Filters: Ha
Exposure: 240 sec Ha, Binning 2x2
Processing: CCDStack and Photoshop
Location: Burke Ave. Observatory, Three Rivers, Michigan
Friday, August 21, 2009
Two New Images With Widefield Scope
©2008 Richard Murray
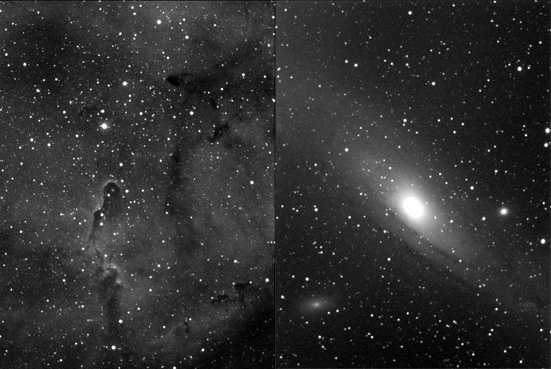
Notes: Here's a couple of unprocessed test images I took last night with my new 66mm Doublet APO. I was having trouble achieving focus until I put a 20mm extender in the optical chain which finally did the job.
What I like about these images is the wider field of view, but most important the stars are nice and round right to the edges of the image. So there's no dreaded vignetting going on. Also because of the short focal length (about F4.7 with the 0.8focal reducer) the ccd exposure times can be shorter. The left image was taken with an Ha filter for 4 minutes and the right image with a red filter for 3 minutes.
More images soon . . . .
Date(s): 8-20-09
Object(s): IC1396 Elephant Trunk Nebula in Cepheus and M31 the Andromeda Galaxy in Andromeda
Telescope: Megrez 66mm SD Doublet APO, WO 0.8 FR/FF
Mount: LX90
Camera: Atik 16hr
Guiding: Lx90 8" SCT, DSI Pro, Phd Guiding
Filters: Ha 6nm, Red
Exposure: 240 sec Ha, 180 sec Red, Binning 2x2
Processing: CCDStack - Quick DDP
Location: Burke Ave. Observatory, Three Rivers, Michigan
Thursday, August 20, 2009
Friday, July 24, 2009
Thursday, May 28, 2009
Springtime At Burke Avenue Observatory
©2008 Richard Murray
For the past six months, I've been taking a hiatus from imaging. I'll eventually get back into astronomy but I'm trying to decide if I should continue with imaging and image processing or maybe focus on a more 'scientific' area of amatuer astronomy. A couple of areas I've been considering are supernova or comet hunting and possilby exoplanet hunting. All of these endeavors are possible even with the modest equipment I have available.
A great article on amatuer supernova hunting 'Searching for Supernovae on a Shoestring' appeared in the July 2009 issue of Sky & Telescope. I have the same ccd imager that the author uses.
So I'll continue to ponder for awhile what part of the universe I want to explore. Until then keep looking up.
Rick Murray
Subscribe to:
Posts (Atom)